使用github page搭建自己的博客
前言
看到那些大佬学习后习惯做自己的学习笔记 小白的我也想着模仿一个,不当可以记录学习历程,还可以知道自己学习的进度。

正文:
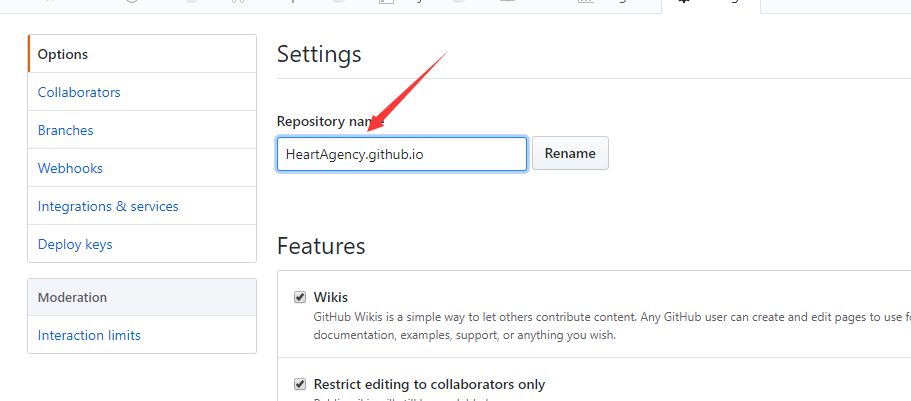
第一步:你的拥有属于自己的博客仓库所以去注册github账号
Github官网:https://github.com
第二步,直接新建一个仓库。
第三步:安装环境工具:Git,nodejs,hexo,npm
- windows安装Git:https://git-scm.com/ Git官网自行下载安装
- Linux下安装: sudo apt-get install git
- windows安装nodejs:https://www.cnblogs.com/hackyo/p/8110951.html //安装nodejs教程和npm教程
- Linux下安装nodejs:https://blog.csdn.net/u014361775/article/details/78865582 //安装nodejs和npm
- 安装hexo:npm i -g hexo
- 查看hexo是否安装成功:hexo -v
- 第四步:开始建立博客
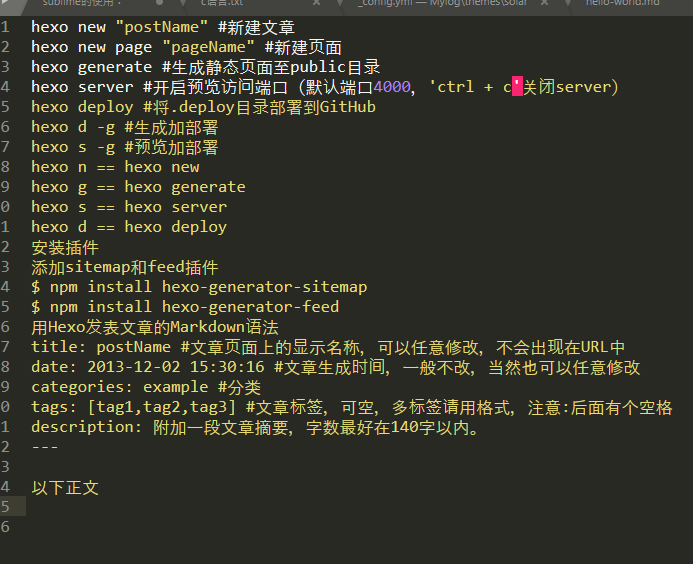
建立一个新文件夹 执行:hexo init 初始化博客: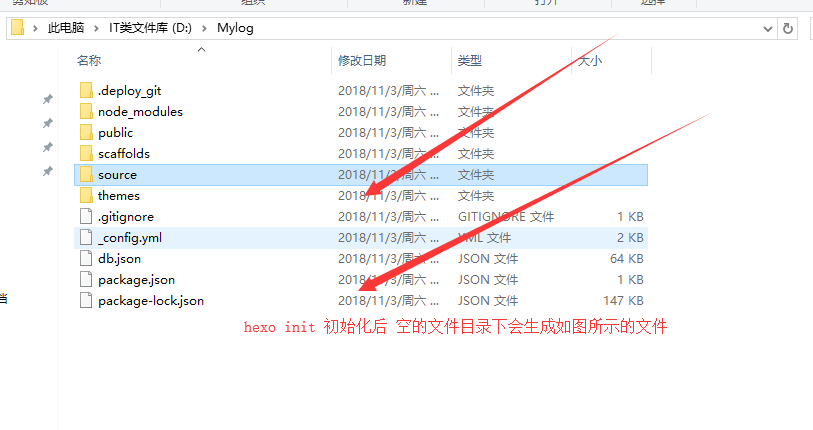
说明一下各文件作用
public–存放的是生成的页面
scaffolds—命令生成文章等的模板
source—用命令创建的各种文章
themes—主题
_config.yml—整个博客的配置
db.json—source解析所得到的
package.json—项目所需模块项目的配置信息
第五步:打开站点文件下的 config.yml配置文件 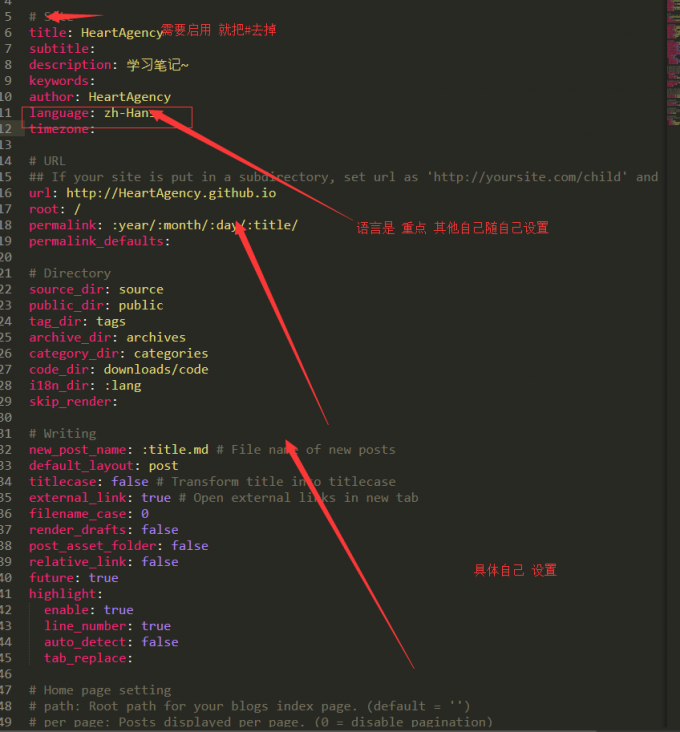
第六步: 主题替换(主题到github上搜索或hexo官网)后修改站点目录下的_config.yml中的themes替换
第七步:运行一下代码,生成博客网站:
hexo clean //删除缓存界面
hexo generate //缩写成hexo g 也行,重新生成界面
hexo server //缩写成hexo s,本地部署网站
此时博客成功访问:http://local:4000
我使用的是solar –当然你可以自己去更改自己开创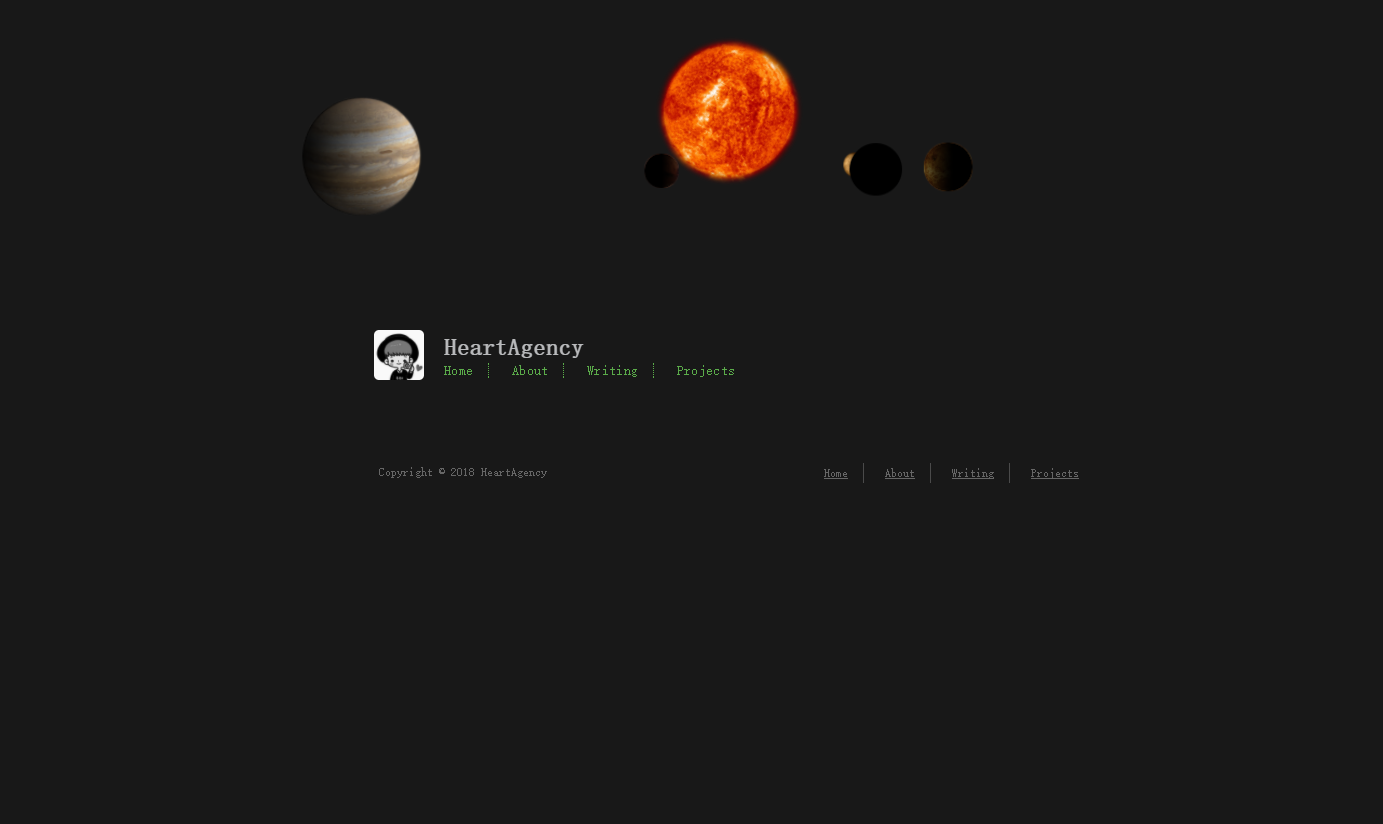
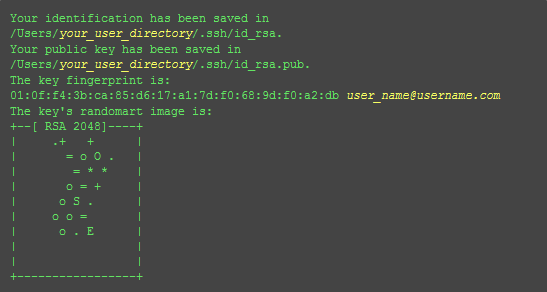
第八步:配置SSH keys
1.$ cd ~/. ssh 检查本机的ssh密钥
2.$ ssh-keygen -t rsa -C “邮件地址@youremail.com”Generating public/private rsa key pair.Enter file in which to save the key (/Users/your_user_directory/.ssh/id_rsa):<回车就好>
3.
- Enter passphrase (empty for no passphrase):<输入加密串>
- Enter same passphrase again:<再次输入加密串>
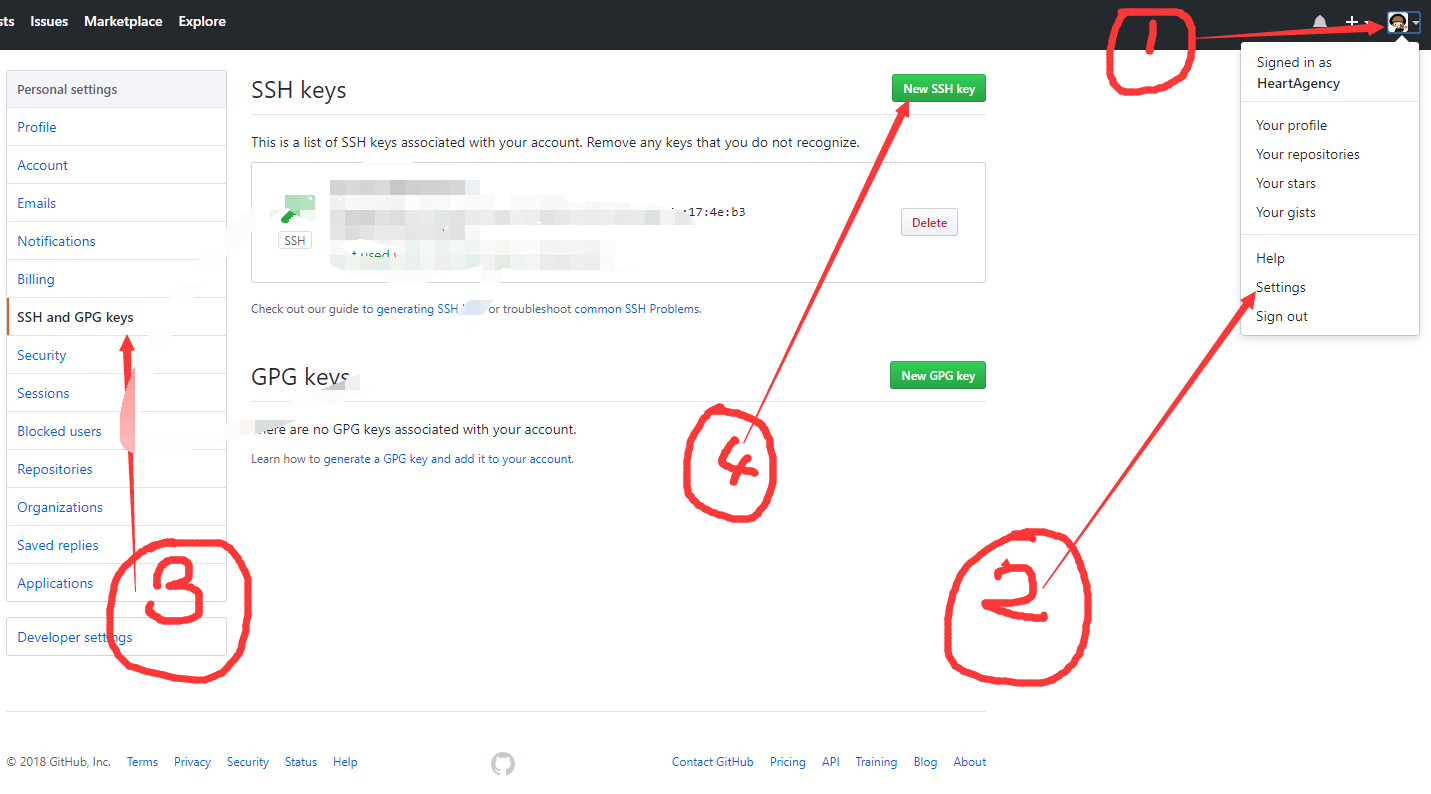
第九步:添加ssh到仓库
第十步 检测ssh添加是否成功:ssh -T git@github.com
以上基本成功,接下来是部署到你的github page上
第十一步:安装deploy npm install hexo-deployer-git –save
配置好插件后
更改站点 目录下的_config.yml
如下添加 (注意每个:前面都要有空格
deploy:
      type:git
    repository:git@github.com:xxxx.github.io.git
    branch:master

转载请注明:heartagency.github.io。